Hey Guys!! Sorry for the excruciatingly long absence, I have realized that work and school and blog don't work very well together...However, I am on winter break now and I have a ton of catching up to do! Anyways, I have always had a love for books, and am an avid reader. So, this is a tutorial and how to turn a book into a clock. I know some of you might be angry at me for turning a book into a clock, but I think it is a great idea! These are all books that I got from THE BOOKSELLER, in Akron, Ohio. They can be found online at <http://www.thebooksellerinc.com/>. This is the second project that I have done with books (the first was a book-lamp, tutorial coming soon) and I think that turning the books into pieces of art is a great idea, they will always be appreciated!
Okay now, on to the tutorial. This was actually a lot simpler than I thought it was going to be, the hardest time I had was actually getting the clock mechanism to work, but that story will come later.
The supplies needed for this project are actually really easy to get a hold of. you will need:
-an old book (I got mine for a dollar at The Bookseller)
-a clock mechanism (can be found at most any craft store)
-an AA battery
-clock numbers (if desired)
-an exacto knife (or 2)
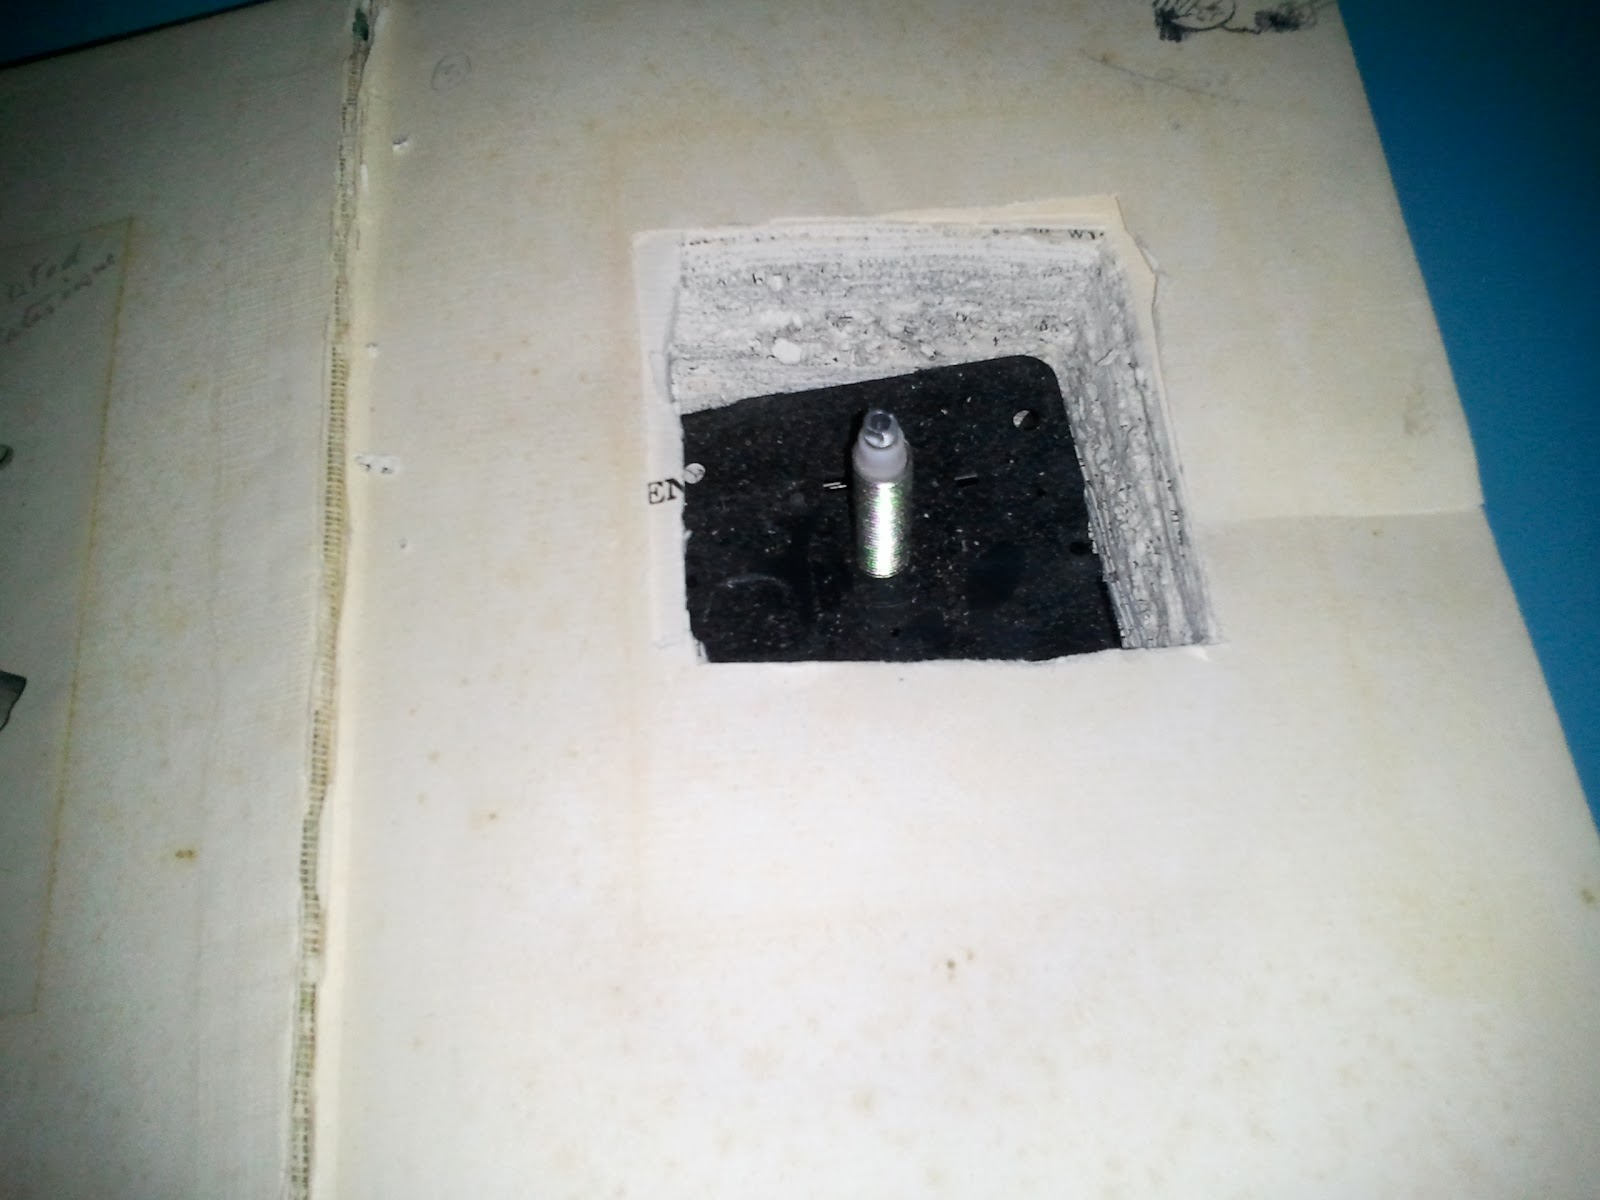
The first (and most time consuming and frustrating step) is to take measure where you wand the center of the clock to be and poke a small hole through the book cover. After you have poke a small hole make a mark on the inside cover. Open the front cover of the book and trace the size of your mechanism, with the center of the mechanism matching the do you drew earlier. Now comes the frustrating part, use the exacto knife to cut a square out of the book the size of your mechanism. HINT: be careful that you are cutting on a straight line, not a diagonal. If the book cover opens too far it will pull the pages at a slant and your square will be more of a tetrahedral shape. After all is said and done it will look like this:

Now, I forgot to take a picture of the next part, but it is simple to explain. I took an extra page from the book and glued it over the top page of the book so it was covering the hole. after the glue dried I cut the page diagonally, making an x. I then folded down the sides of the x and glued them to the inside of the hole. This step is necessary, but it makes the project much neater, and makes it easier to get the clock mechanism in and out of the book. Next you are going to place your mechanism into the hol in the book and make sure it fits. It might need a little adjusting.


Next, make sure the center of your clock matches the hole you made in the cover. If it doesn't, do not fear, it can be fixed! if the hole doesn't match up, you have two options. First, make the hole in the book bigger so the mechanism so can be adjusted. Second, when you make the hole in the cover over, move it to where you want. I would suggest the first option if your centers are way off, not even touching, and the second option if they are just off a little. After you have them matched up you have to widen the hole in the cover. I opted for the easy method and just pushed a sharpie through the cover :)

At this point you may want to consider cleaning up the hole in the cover, I trimmed back the extra stuff around the hole so the clock hands would sit straight. When I was done cleaning it up i slabbed some tacky glue on it to keep everything smooth. The next step is where it gets a little tricky. All you have to do is follow the directions on the back of your clock. However, make sure that everything is really tight before you put the hands on, they are easily bent and kind of difficult to get off! The picture on the left is a picture of the clock I used. The specific sizing is on the right of the label, they come in all different sizes so make sure you get the right one for your book! The picture on the right is the top of the clock coming through the cover of the book and the nuts are tightened to keep everything together.


Next, keep following the directions on the back of your clock and put the hands on. This is where I had the most trouble, I originally bought a different clock. I installed it, but it didn't keep the time correctly. The hands would stick together and the hour hand would move 4 or 5 hours in just 60 minutes. I am no sure what happened, but I bought a new one and it worked much better! This is a picture of the clock without the number. (I didn't know if I wanted them or not...)
But I eventually decided I wanted to put the numbers on, and I really like how it turned out! I think the numbers really made a difference! I also considered painting numbers on, but I opted out because I really liked the way the gold numbers matched!
Finally, here is the finished book clock sitting on my book shelf. I love it!
Hopefully more updates coming soon, but until then, Happy Holidays!


