Tuesday, September 25, 2012

Resurfacing Old Furniture

 I found this post saved as a draft, not sure why, I wrote it in July!

           It has been a month already from my last blog post, I don't know where my time has gone! Truthfully, my best friend, partner in crime (and fellow DIY craft enthusiast) has been gone in London for 2 months this summer and it hasn't been the same with out her! I have several crafts lined up for when she gets back next week! This project all started when I found a dresser sitting on the side of the road during my christmas break of 2010. I made my sister help me load it into the car and we snuck it into my basemement. It was covered in snow, smelled like moth balls, and needed some serious diy love. I cleaned it using various wood cleaners. I then let it sit in my basement with all of the drawers out until summer started. When I mentioned my project to my partner in crime she got very excited because she had a desk that needed resurfaced as well. We had no idea what we were doing, but they turned ot pretty awesome!

Materials:
-something to resurface
-sand paper and sander
-wood putty
-new hardware (I purchased mine at Hobby Lobby)
-paint
-primer
-wallpaper stripper (if necessary)

Step One:

My drawers had old yellow wallpaper in it that needed removed. So I used DIF concentrate wallpaper remover. Removing wallpaper is a PAIN, but it will all be worth it in the end. This being said, make sure you take the time to do it right, and get ALL of the wallpaper off.


Step Two:
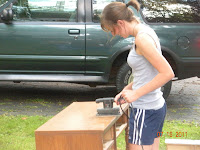
If the wood is shiny and has a finish use a sander to sand the surface of the furniture. Make sure that you sand every surface that you are painting, otherwise the paint will just chip off. We tried using some product called Xylene that was supposed to prep the wood to paint. It had scary warnings on the back of it, and didn't work too well, so we just sanded :) After this step make sure you wipe off your furniture really well using a wet cloth. Also make sure it is completely dry before you proceed.


Step Three (optional):
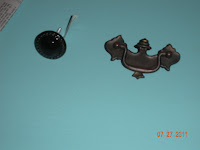
This step may not be necessary, it depends on what you are doing with your hardware. I replaced mine from drawer pulls to knobs. Because of this I had to fill the old holes with wood putty. Once the putty was completely dry sand it down so it is even with the wood surface and drill new holes for your hardware.


Step Four:
Paint all of the surfaces with primer. One coat will suffice.


Step Five:
Apply two coats of your paint, making sure that you leave plenty of time for your coats to dry in between. After this, paint on any embellishments or designs that you want to add. My piece of advice for you (what I learned the hard way) LESS IS MORE.

Here are our before and after pictures:


and here are my after pictures, sadly I don't have any pictures of hers, but I will find some soon!


I really liked how my dresser turned out! Sadly, I haven't been able to use it yet because there is no room in my apartment. For the past year and a half it has been in my basement holding all of my craft supplies :( Happy crafting!


Cheesy Quinoa and Garlic Lemon Chicken

Hey guys, sorry I haven't been around much lately, the start of the school year was absolutely crazy!! I spent a lot of time decorating my apartment, there are pictures to come soon! My first post of the school year is what I made for dinner last night, it was super easy and DELICIOUS. At the beginning of the school year I accidentally bought a giant bag of quinoa instead of couscous and have been trying recipes with it ever since. So far my meals had been pretty good, but not necessarily something I would make over and over again, until last night. I made cheesy broccoli quinoa and garlic lemon chicken with caramelized onions and peppers. Here is the recipe:

Cheesy broccoli Quinoa:


-1 1/2 cups quinoa, rinsed and drained
-Veggies of your choice (optional), I used broccoli
-good pinch of salt
-2 cloves garlic, minced
-2 large eggs
-1 cup soy milk
-1 1/2 cups grated cheese, I used a mixture of mozzarella and cheddar (more for sprinkling)
-2 white onions, chopped
-panko bread crumbs (about 1 cup)


1) prepare the quinoa according to the directions on the package. I used 1 1/2 cups of quinoa and 3 cups of water. brought it to a rapid boil and let simmer for 15 minutes, until al the liquid was gone and the quinoa was done. Be warned, the quinoa expands, ALOT.
2) While the quinoa is cooking start cooking any veggies you want to add to your dish. I steamed broccoli and sautéed some chopped onions.
3)Preheat oven to 350 F. Coat 9x13 inch dish with cooking spray.4) Whisk together eggs and milk in large bowl. Fold in quinoa mixture and cheese. Transfer to 9x13.5) sprinkle with extra cheese and panko. bake for 30 minutes (I covered mine in foil for 15 minutes and then uncovered it for the last 25 so the cheese could get bubbly), or until the bread crumbs are browned and the cheese is bubbly.


Garlic Lemon Chicken with caramelized peppers and onions


-this was super easy, and I didn't use any recipe. I just cooked my chicken in a pan and covered it in 5-6 cloves of minced garlic. While it was cooking, I squeezed a lemons worth or juice over the top. -I started my caramelized peppers and onions when I started sautéing the onions for the cheesy quinoa. The longer you let the peppers and onions caramelize the better, mine were cooking on low heat for about an hour. I cooked them with a little bit of olive oil and some garlic over LOW heat.


Sadly, I forgot to take pictures, but we demolished EVERYTHING. It was seriously so good. The cheesy quinoa kind of tasted like broccoli cheddar soup from Panera. This recipe is also great because you could add any vegetable to it, you could even add some cubed chicken! Happy cooking!!!


ps. I love fall because there is pumpkin EVERYTHING. I have been drinking Iced pumpkin Chai from Caribou like it is my job!