It has been a month already from my last blog post, I don't know where my time has gone! Truthfully, my best friend, partner in crime (and fellow DIY craft enthusiast) has been gone in London for 2 months this summer and it hasn't been the same with out her! I have several crafts lined up for when she gets back next week! This project all started when I found a dresser sitting on the side of the road during my christmas break of 2010. I made my sister help me load it into the car and we snuck it into my basemement. It was covered in snow, smelled like moth balls, and needed some serious diy love. I cleaned it using various wood cleaners. I then let it sit in my basement with all of the drawers out until summer started. When I mentioned my project to my partner in crime she got very excited because she had a desk that needed resurfaced as well. We had no idea what we were doing, but they turned ot pretty awesome!
Materials:
-something to resurface
-sand paper and sander
-wood putty
-new hardware (I purchased mine at Hobby Lobby)
-paint
-primer
-wallpaper stripper (if necessary)
Step One:
My drawers had old yellow wallpaper in it that needed removed. So I used DIF concentrate wallpaper remover. Removing wallpaper is a PAIN, but it will all be worth it in the end. This being said, make sure you take the time to do it right, and get ALL of the wallpaper off.
Step Two:
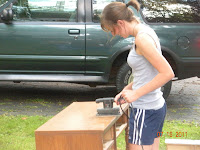
If the wood is shiny and has a finish use a sander to sand the surface of the furniture. Make sure that you sand every surface that you are painting, otherwise the paint will just chip off. We tried using some product called Xylene that was supposed to prep the wood to paint. It had scary warnings on the back of it, and didn't work too well, so we just sanded :) After this step make sure you wipe off your furniture really well using a wet cloth. Also make sure it is completely dry before you proceed.

Step Three (optional):
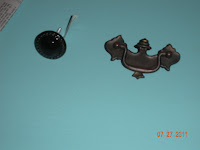
This step may not be necessary, it depends on what you are doing with your hardware. I replaced mine from drawer pulls to knobs. Because of this I had to fill the old holes with wood putty. Once the putty was completely dry sand it down so it is even with the wood surface and drill new holes for your hardware.
Step Four:
Paint all of the surfaces with primer. One coat will suffice.
Step Five:
Apply two coats of your paint, making sure that you leave plenty of time for your coats to dry in between. After this, paint on any embellishments or designs that you want to add. My piece of advice for you (what I learned the hard way) LESS IS MORE.
Here are our before and after pictures:


and here are my after pictures, sadly I don't have any pictures of hers, but I will find some soon!


I really liked how my dresser turned out! Sadly, I haven't been able to use it yet because there is no room in my apartment. For the past year and a half it has been in my basement holding all of my craft supplies :( Happy crafting!


